• Skip to main content
  • Skip to primary sidebar

Huskey Practice Manager Blog

Helping Accounting Firms Grow

  • Home
  • Features
  • Testimonials
  • Pricing
  • Contact
  • Help
  • Login
  • Free Trial

Help

Messages

October 19, 2018 by Jason Huskey

Use messages to replace those pink “While you were out” sheets that clutter your desktop.  Keep reading or watch the video to learn more.

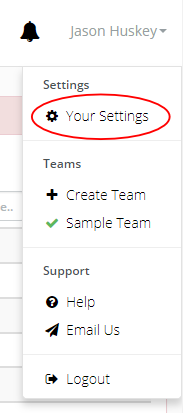
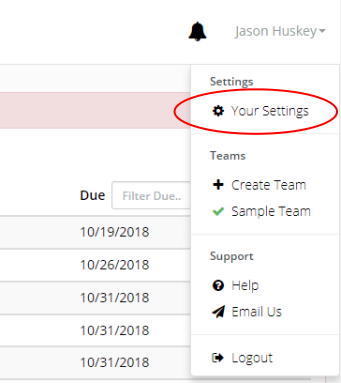
The menu bar shows how many messages are waiting for you.  Click Messages in the menu bar to start.

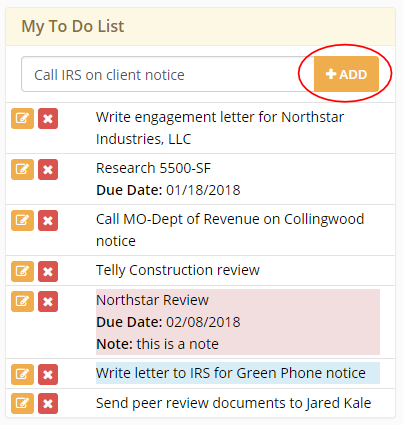
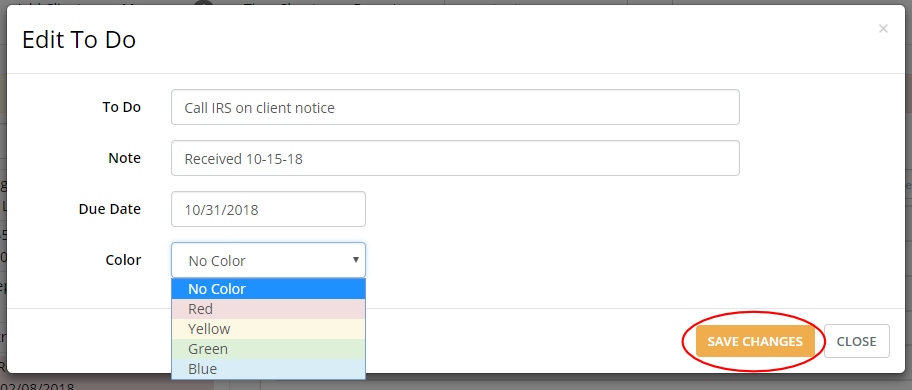
You will see any messages that are waiting for you.  Click ADD NOTES to add a note to the message.

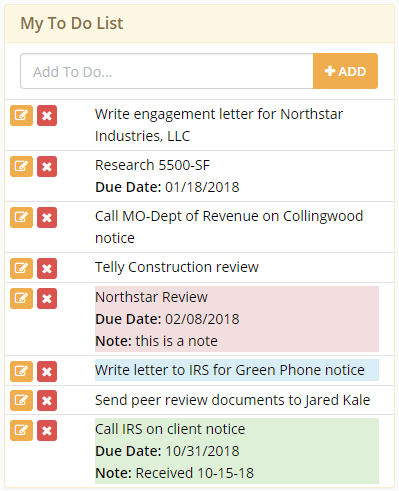
Click DONE when you are finished with the message.  The message will disappear from your screen but you can always find it by searching your messages.

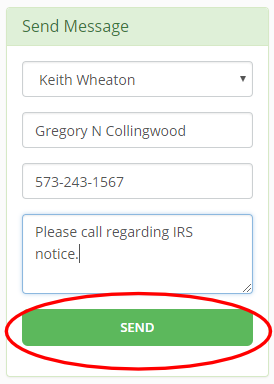
To send a message to another user choose that user’s name from the dropdown box.  Type in a client name and select that client just like on the time sheets.  This will create a clickable link for the person receiving the message.  If the person calling is not a client in your database just type their name without choosing a client.

Fill in a phone number if necessary and add a short message.  Click SEND and you are all done.

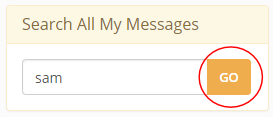
To search your past messages type a part of the client’s name or any part of the message that you might remember into the search box and click GO. 

You can also click GO without any search terms to see all your previous messages.

Here are the results…  The client’s name is a clickable link that will take you to their contact page so you can see notes, phone numbers, and email addresses.

Filed Under: Help Tagged With: Messages

To Do List

October 19, 2018 by Jason Huskey

The to do list is a great place to put jobs that do not recur.  Watch the video below to learn more.

To add an item to your to do list just type a description in the box and click ADD.

Click the red X button to remove an item from the list or click the orange button to edit the item.  Let’s edit the item we just added.

In the editing pop-up window you can add a note or a due date.  You can also add a color to signify how important the job is.  Remember to click SAVE CHANGES.

Your updated to do item will now show your changes.

Filed Under: Help Tagged With: To Do List

Setup Billing Rates

October 17, 2018 by Jason Huskey

The Time Spent Report will calculate a dollar amount for each job but you must setup default billing rates first.  Click your name in the top right corner and then click Your Settings.

Click Default User Rates/Work Types

Default User Rates

Default User Rates will be used in the time spent report when a work type is not chosen.  If a work type is chosen the work type rate will be used instead.  To change a default user rate click the EDIT button next to the user.

Update the Rate Per Hour and click SAVE CHANGES.

Work Types

Use work types in your timesheets to assign a certain rate per hour to that job.  To add a new work type just type a short Work Type name and a Rate Per Hour.  Then click ADD.

The work type will show up in the list below.  Click EDIT next to any work type to change it.

Make your changes and click SAVE CHANGES.

The edit screens will give you a warning that changing the rate per hour will affect all periods.  This means that for whatever time period you run a Time Spent Report, it will use the current Default User Rates and Work Type rates to calculate the dollar amount.

Filed Under: Help Tagged With: Setup

Time Sheets

October 16, 2018 by Jason Huskey

If you bill by the hour it is obvious that you must track time.  But even if you mostly do value billing it’s still a good idea to keep track of your time.  At some point you will need to re-evaluate your billing rates.  With Huskey Practice Manager you can easily pull a time spent report to determine if you are under billing.

To enter time on your spreadsheet click the Time Sheets link at the top of the page.

The program will default to showing a timesheet for the current date at the beginning of every day.  If you need to see a time sheet for a prior date just pick a new date and click CHANGE DATE.

To enter time, start typing a client’s name in the Client box.  The program will find all matching clients and you can choose the correct one.  Complete the remaining fields and click SUBMIT.

All fields are required except for the Work Type and Stop time fields.  You can leave the Stop Time blank and complete it when you finish the work.

To edit a time sheet entry click the EDIT button next to the row you need to change.

Make your changes and click SAVE CHANGES.

Time Spent Report

To pull time on any or all clients click on Reports and then Time Spent.

Pick a beginning and ending date.  Then select one or more Work Types, Employees, Businesses, and Individuals.  Click GET REPORT.

Your report will look like the below picture.  Hold down ctrl + p if you would like to print this report.

The amount column is calculated by multiplying the number of hours by either the Work Type if one was chosen or the Default User Rate if Work Type was left blank.  To setup these rates follow the tutorial found here.

Employee Hours Report

The employee hours report will help you complete payroll.  Click Reports at the top menu and then click Employee Hours.

It defaults to showing the current month.  Pick a new beginning and ending date and click GET REPORT to change the date range.

Click on any of the dates for an employee to see their full timesheet for that day.

Filed Under: Help Tagged With: Time Sheets, Timekeeping

Tax Return Tracking

October 13, 2018 by Jason Huskey

Use tax return tracking to know where returns are in your office and to quickly give status updates to your clients.

Set Up Routing Sheets

Before tracking tax returns you must set up a routing sheet for individual and business tax returns.  This is found in settings.  

Click on your name in the upper right corner, then click Your Settings.

Click Individual Routing Sheet

From this screen you can add, remove, and re-order events.  Set it up to match the processes you follow in your office.

To re-order events just drag them to a new position.

Make sure to click SUBMIT CHANGES after you are done.

Now go set up the Business Routing Sheet the same way.

Assign Return Types to Clients

Choose a client and go to their client info page.  You then need to make sure a return type is selected.

Click EDIT CLIENT

Scroll to the bottom of the form and choose 1040 as the return type.

Click SAVE CHANGES

You will now see a tax return tracking sheet on the left side of the screen.  Choose a preparer by picking a name from the dropdown box.  

Whenever an event is completed just click on the red button beside it.  The person’s name who completed that event will show up with a date.

Setup Your Dashboard

Go to your dashboard and scroll down to the My 1040 Stats box.  Here we can add tax return events so that you can see returns that need to be completed.

Choose events in the dropdown box and click ADD.

The “Assigned Preparer” event will show you all returns that are assigned to you but not yet prepared.

Now when a client calls for a status update on their return anyone in the office can easily look it up.

Filed Under: Help Tagged With: Tax Return Tracking

Complex Recurring Job Example

October 12, 2018 by Jason Huskey

Missouri sales tax is due on different dates depending on which month of the quarter you are in.  For the first and second months it is due on the 20th of the month after.  For the third month it is due on the last day of the month after.

To set up this recurring job you will need 3 Recur Rules.

Recur Rule #1

I like to start at the beginning of a year for the 1st Due Date.  So we will choose 1-1-18 for this example.  

Make it repeat monthly every 3 months.  This first Recur Rule will be due on the last day of the month because it is for sales tax collected in December.  Since December is the third month in a quarter the return is due on the last day of the month after.

Here is the recipe:

1st Due Date: 01/01/2018
Repeats: Monthly
Repeat every: 3 months
Repeat by: Last day of the month

Recur Rule #2

The second recur rule will be for sales tax collected in January so it will be due on the 20th of the month after.  

Here is the recipe:

1st Due Date: 02/01/2018
Repeats: Monthly
Repeat every: 3 months
Repeat by: 20th day of the month

Recur Rule #3

The final recur rule will be for sales tax collected in February so it will be due on the 20th of the month after. 

Here is the recipe:

1st Due Date: 03/01/2018
Repeats: Monthly
Repeat every: 3 months
Repeat by: 20th day of the month

Remember to click SAVE TEMPLATE when you are finished.  If you need any help setting up a complex recurring job give me a call or email.

Learn how to set up other types of recurring jobs:

Add a Biweekly Payroll Job
Add a Quarterly Recurring Job

Filed Under: Help Tagged With: Recurring Jobs

  • « Go to Previous Page
  • Go to page 1
  • Go to page 2
  • Go to page 3
  • Go to Next Page »

Primary Sidebar

  • Contact Us
  • Huskey Practice Manager’s Billing Process
  • Importing Clients
  • Label Printing
    • Setup Label Printing
  • Messages
  • Workflow Manager
    • Add a Biweekly Payroll Job
    • Add a Quarterly Recurring Job
    • Complex Recurring Job Example
    • Add A Non-Recurring Job
  • Setup Billing Rates
  • Tax Return Tracking
  • Tax Returns Report
  • Time Sheets
  • To Do List
  • Home
  • Features
  • Testimonials
  • Pricing
  • Contact
  • Help
  • Login
  • Free Trial

© 2023 · Huskeyweb LLC